Setting Up Stripe on IndieMade
If you're new to handling payments on IndieMade, don't worry! For a basic guide, click here.
Stripe is a straightforward option for accepting payments. You'll mainly need a Publishable Key and a Secret Key.
Setting Up Stripe on IndieMade
- Go to your IndieMade Dashboard.
- Click the gear-shaped Settings icon in the upper right corner.
- Select Payment Providers from the dropdown menu.
- On the Payment Providers page click Add Payment Provider.
- Click Stripe (Payment Element) from the list of available payment providers. This is the current Stripe option; the plain Stripe entry is the older card-only version.
- Enter your Publishable key and Secret key in the respective fields. (Don't have them yet? See below.)
- Click Save. Shoppers can pay by card right away.
What Your Shoppers Can Pay With
Stripe (Payment Element) shows one payment form at checkout. It offers every payment method you have switched on in your Stripe account: credit and debit cards, Apple Pay, Google Pay, and buy-now-pay-later options such as Klarna and Afterpay. Shoppers do not need an account on your site to use any of them.
To add or remove a method, open Payment methods in your Stripe Dashboard and turn it on or off there. Nothing needs to change on IndieMade; the checkout form picks up your Stripe settings automatically.
Apple Pay and Google Pay
Apple Pay and Google Pay only appear on web addresses that are registered with Stripe. The platform does this for you. When you save your Stripe keys, it registers your IndieMade address and your custom domain, if you have one. If you add a custom domain later, it is registered too.
Two things must be true for the wallet buttons to show at checkout:
- Apple Pay and Google Pay are switched on in your Stripe Payment methods.
- Your store addresses are connected to Stripe. The Apple Pay & Google Pay panel on the Stripe (Payment Element) settings page shows the status of each address. If one is marked Not on yet, click Save again. Apple Pay can take a few minutes to verify.
Shoppers only see the wallet buttons if their phone or browser has a wallet set up, for example Apple Pay in Safari or Google Pay in Chrome.
Pay-later Methods and Returning Shoppers
Methods like Klarna send the shopper to the provider's page and then back to your store. A shopper who refreshes the return page is not charged twice. The order is placed once and shows up in Dashboard → Orders like any other order.
Optional: Customizing the Decline Message
If you'd like to personalize the message customers see when a card is declined, use the Message shown when a card is declined field. A placeholder message is already in place, so this step is optional. You can also change the Checkout label, which is the name shoppers see for this payment option at checkout.
How to Find Your Stripe API Keys
Your API keys are your secure credentials with Stripe. They're easy to find in your Stripe Dashboard.
- Log in to your Stripe account.
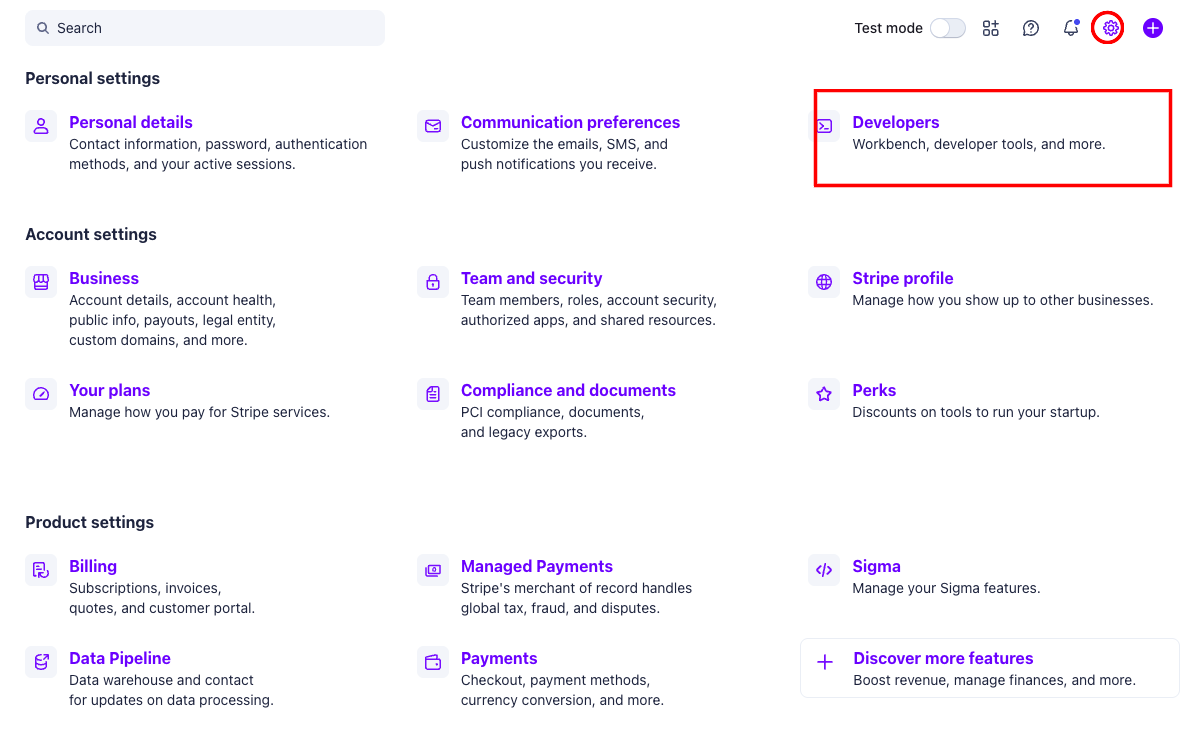
- Click the Settings gear icon in the top-right corner of the dashboard.
- Under Personal settings, click Developers.
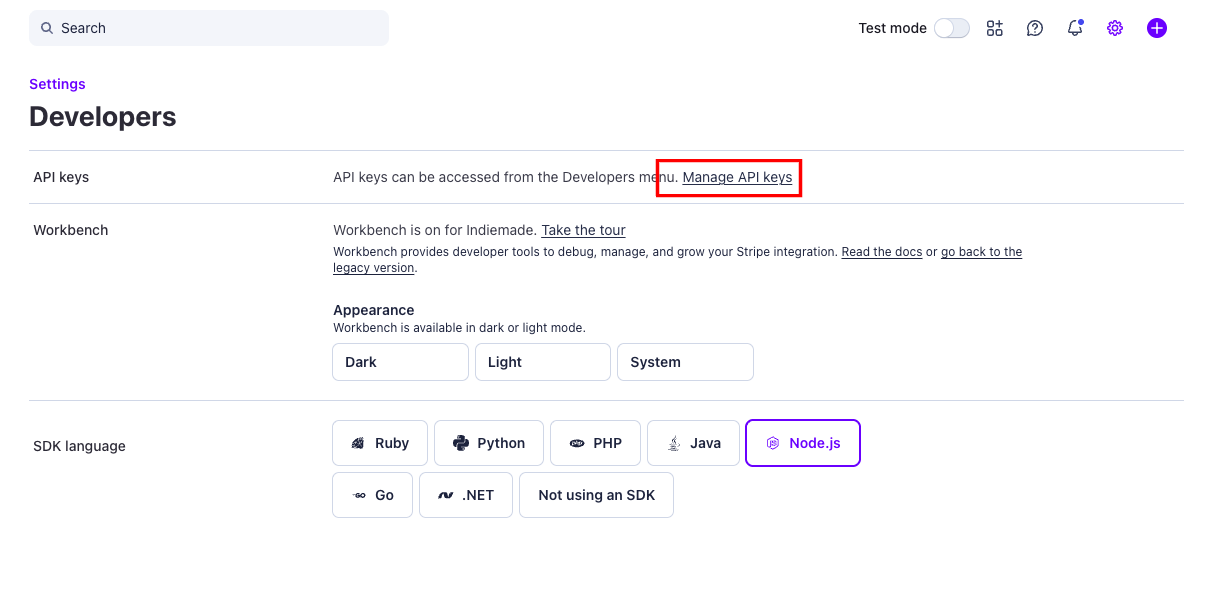
- On the Developers page, click the Manage API keys link in the API keys row.
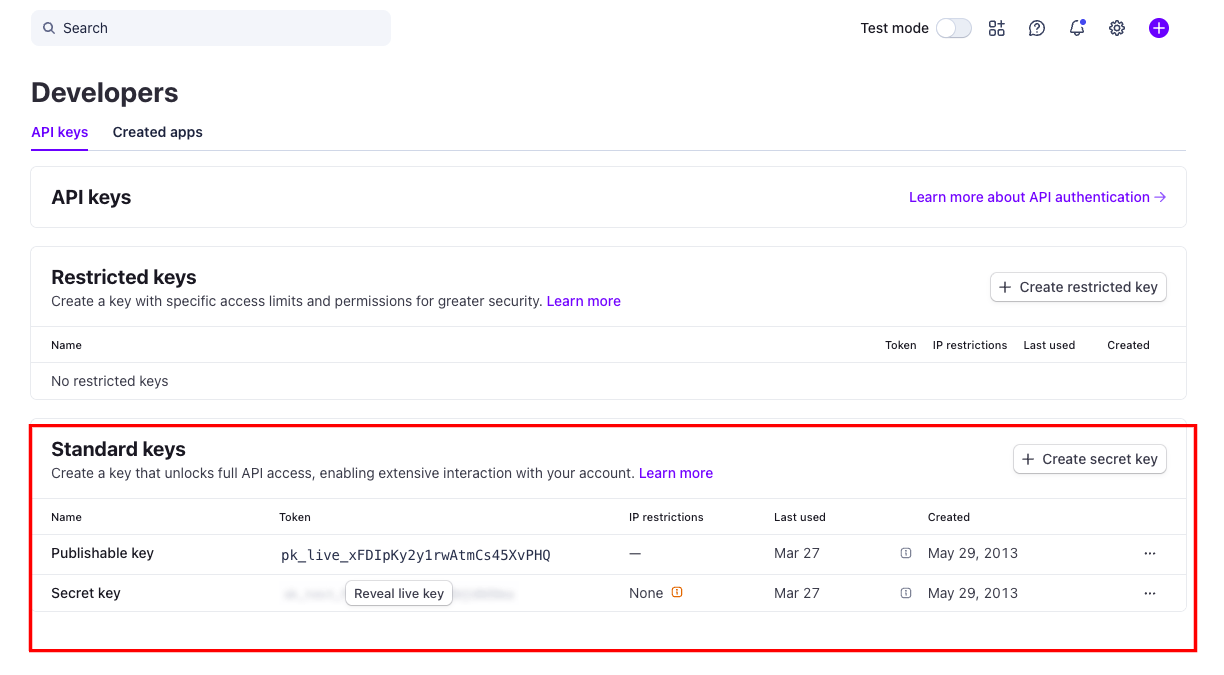
- You'll see your keys under Standard keys. Your Publishable key is shown in the Token column. For your Secret key, click Reveal live key to view it.
Questions? Email support@indiemade.com.