Designing Your Categories Landing Page
Your main categories page gives shoppers a visual starting point for browsing your store. IndieMade builds it automatically from the public categories in your Category Manager, and you can control its heading, introduction, card layout, subcategory behavior, and more.
Your categories page is available at /categories on your IndieMade address or custom domain. You can also make it your homepage.
Open the categories-page settings
- Go to your Dashboard.
- Click Categories.
- Click the gear above the category tree.
This opens Category Settings. You can also change the same store-wide settings while signed in: visit your categories page, click Settings in the bottom toolbar, and open the Display tab.
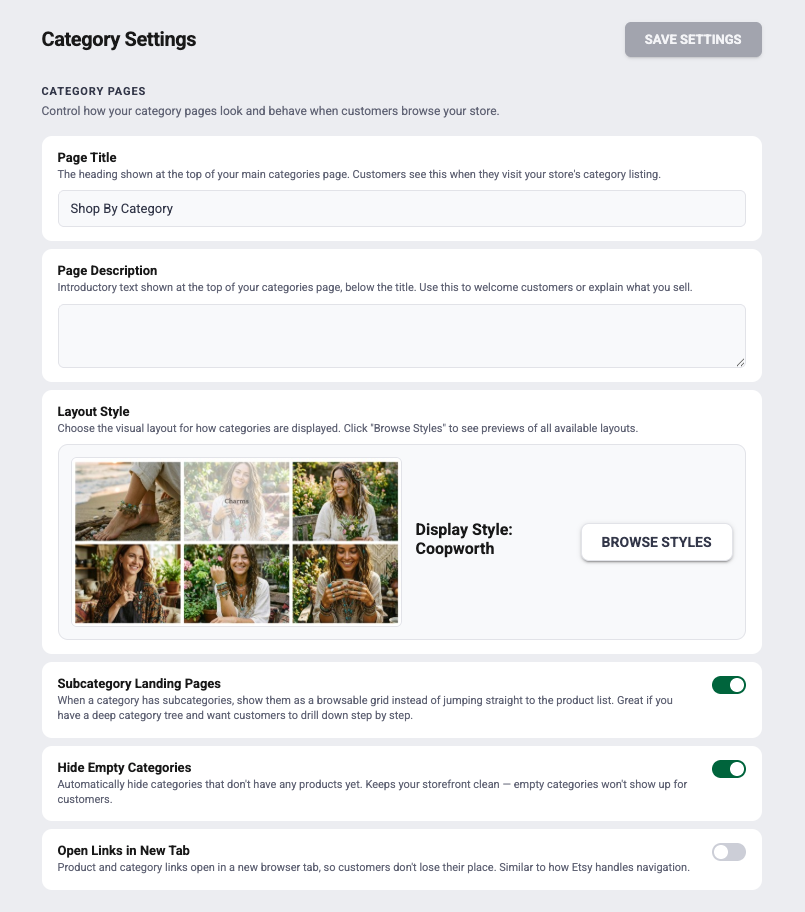
Set the page title and description
- Page Title is the heading shoppers see at the top of the main categories page.
- Page Description is optional introductory text shown below the heading. Use it to explain what you sell or help shoppers choose where to begin.
Choose a layout style
Layout Style controls the visual design of the category cards. Click Browse Styles to preview the available layouts, then choose the one that best suits your photography and store design.
Choose how subcategories behave
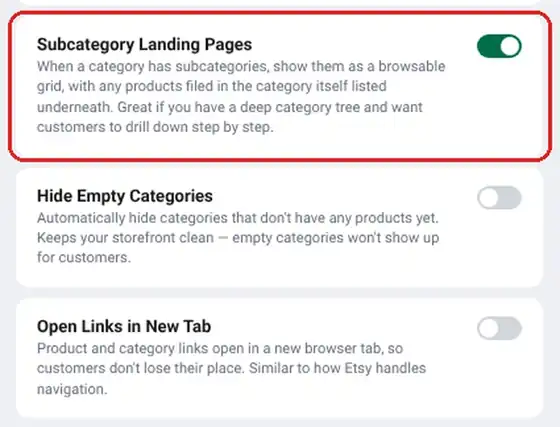
Turn on Subcategory Landing Pages when you want a category with subcategories to open on a set of subcategory cards. Shoppers move through a deep category tree one level at a time.
Products you filed in the category itself, and not in one of its subcategories, are listed underneath the cards. Say your Lamps category has Table Lamps and Pendant Lights under it, and you also filed a floor lamp and a new tripod lamp straight in Lamps. Lamps opens on the Table Lamps and Pendant Lights cards, with the floor lamp and the tripod lamp below them. Products inside the subcategories are not repeated there; shoppers reach them through the cards.
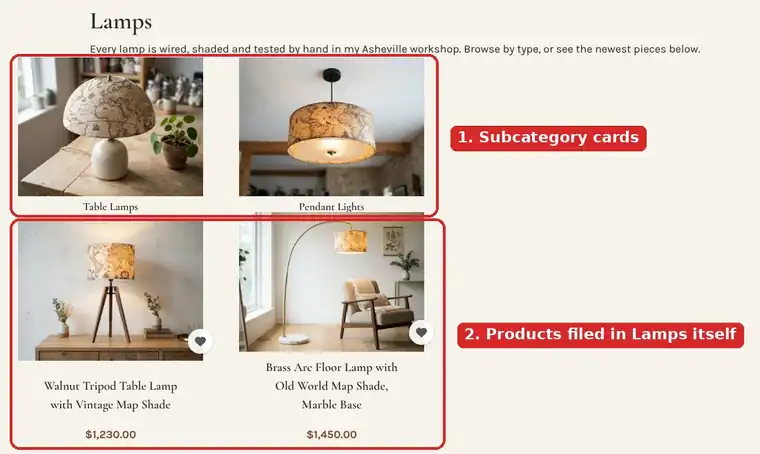
- The category description shows once, at the top, above the cards.
- A category with no products of its own shows only the cards.
- This works with every category Layout Style.
When the setting is off, opening a category takes shoppers straight to its product list.
Where to find the setting
It is one setting for your whole shop. You can change it in any of three places, and a change in one shows in the others:
- Dashboard → Categories: click the gear above the category tree. Subcategory Landing Pages is under Category Pages. Turn it on and click Save Settings.
- Category Display Settings: open any category page on your site while signed in and click Settings in the bottom toolbar. On the Display tab, tick Subcategory Landing Pages under Category Pages and click Save.
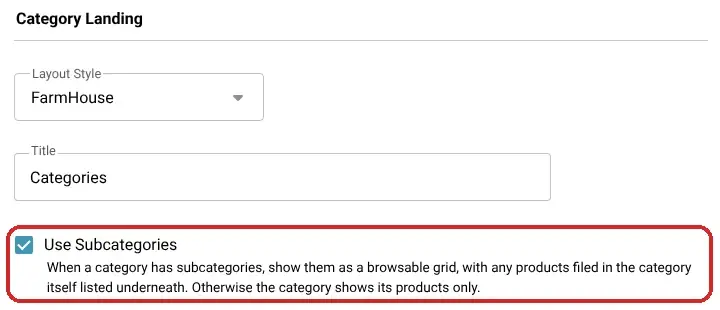
- Dashboard → Design → Store Design: under Category Landing, tick Use Subcategories and save. It is the same setting with an older name.
Hide empty categories
Turn on Hide Empty Categories to keep categories with no published products out of the storefront. The categories stay in your Dashboard, so you can prepare them before products are ready.
Open links in a new tab
Open Links in New Tab makes product and category links open without replacing the page the shopper is viewing. Most stores can leave this off for standard browsing behavior.
Use the categories page as your homepage
In Dashboard → Settings → Basic Site Info, choose Categories as your homepage. If your design offers Show Page Title on Homepage, use it to decide whether the categories-page heading appears there.
Related settings
- Use Category Navigation to show a separate category menu on store pages. See Showing a Category Menu in Your Store.
- Use Main Menu Categories to place categories directly beside Home, About, and your other main-menu links. See Adding Your Categories to Your Main Menu.
- Use Image Settings in the Category Manager to choose the crop shape applied to category photos.
To create, nest, reorder, or edit the categories themselves, see Managing Product Categories.