Showing a Category Menu in Your Store
The Category Menu gives shoppers a dedicated way to browse product categories while they move through your store. You can place it near the header, above your products, or in a sidebar and choose a style that fits your site.
Open Category Navigation settings
- Go to Dashboard → Categories.
- Click the gear above the category tree.
- Scroll to Category Navigation.
You can also reach the same settings while signed in: visit your main categories page or any category page, click Settings in the bottom toolbar, and open the Display tab.
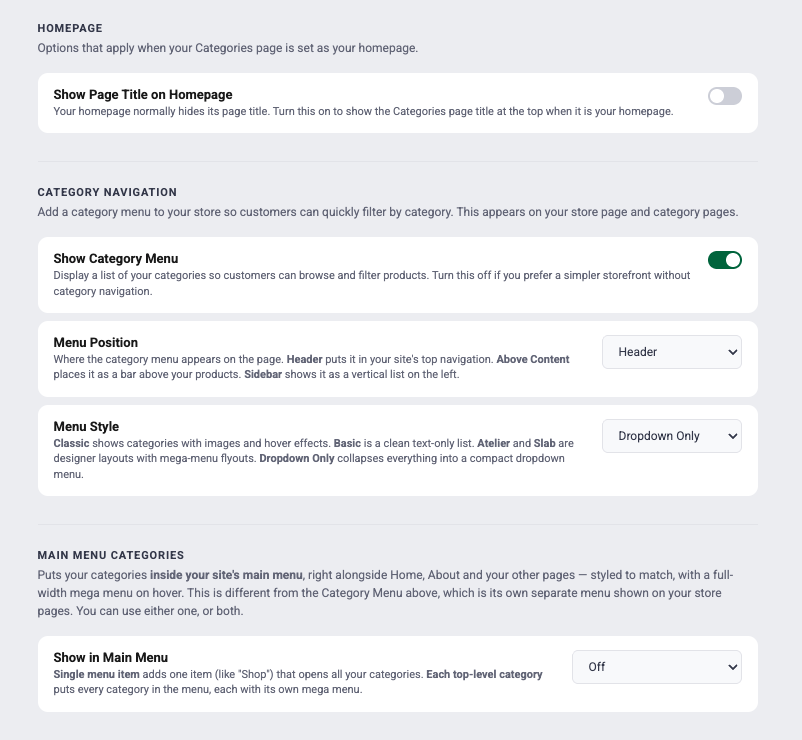
Turn the Category Menu on
Enable Show Category Menu, choose where it should appear, and save your settings.
Choose a menu position
- Above Header places the menu at the top of the site.
- Below Header places it beneath the site header.
- Above Products keeps it close to the product or category listing.
- Left Sidebar creates a vertical browsing menu beside the listing when the design supports it.
Choose a menu style
Select the style that best matches your site. Available designs can include Classic, Basic, Atelier, Slab, and Dropdown. The live preview makes it easy to compare them.
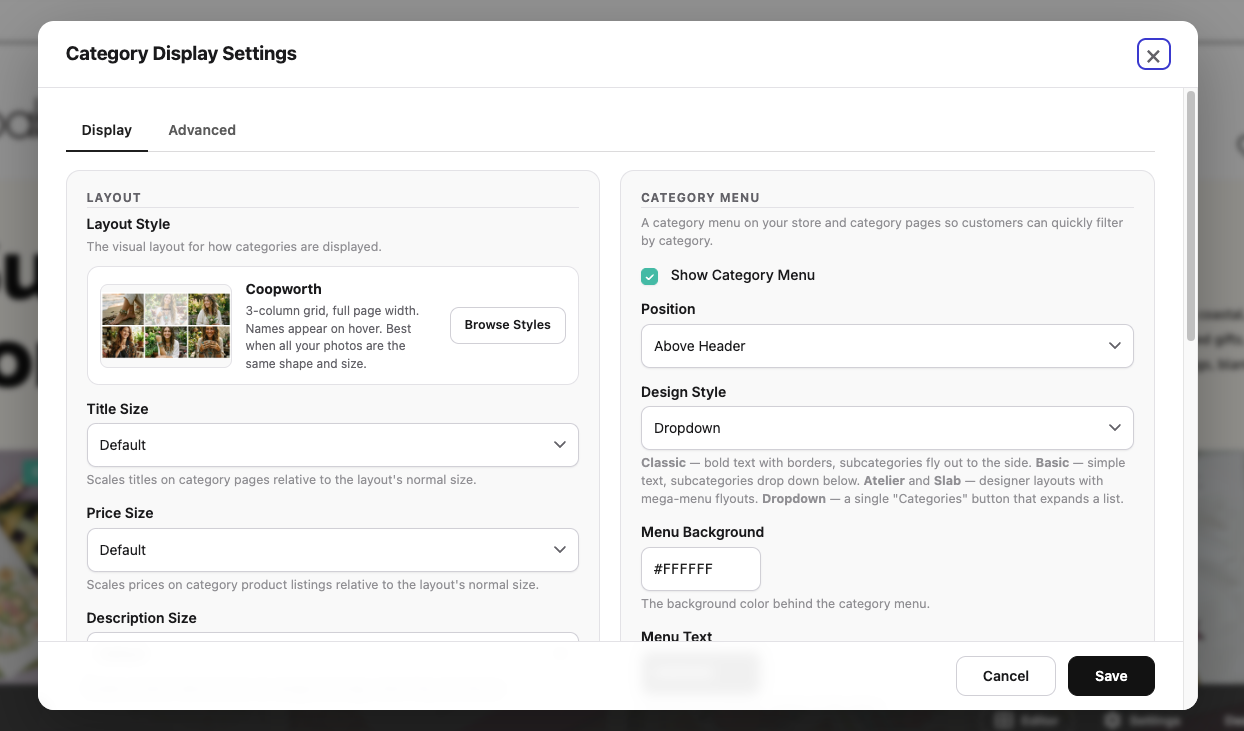
Adjust menu colors
Use the color controls in the Display tab to coordinate the Category Menu with your store design. Save, review the result on desktop and mobile, and make sure the labels remain easy to read against the background.
If a category does not appear
- Open the category in Dashboard → Categories and make sure its visibility is Public.
- If Hide Empty Categories is on, make sure the category contains at least one published product.
- Check that the category is in the intended place in the category tree.
To put categories directly in your site's main navigation instead, see Adding Your Categories to Your Main Menu.