Adding a Blog to Your IndieMade Site
A blog is where your shop gets to talk: new work, how a piece is made, a show you are doing, a sale that is coming. Every IndieMade site has one built in, on every plan. There is nothing to install. Search engines like fresh writing, so even one post a month helps people find you.
One honest warning: a blog whose newest post is two years old makes a shop look closed. If you start one, plan to add to it. If you would rather not, you can hide the Blog link from your menu (see the end of this page).
Writing a post
- Go to Dashboard → Blog Posts and click Add Post.
- Type a Title.
- Write the post in the editor. Use Format for headings, and the picture button to put photos inside the text.
- Under Images, click Upload Images to add your cover picture. The first picture is the cover: it shows on your blog page, in Recent Posts and when someone shares the post. Drag pictures to change the order.
- Choose how to publish (below) and click Save.
Publishing now, later, or not yet
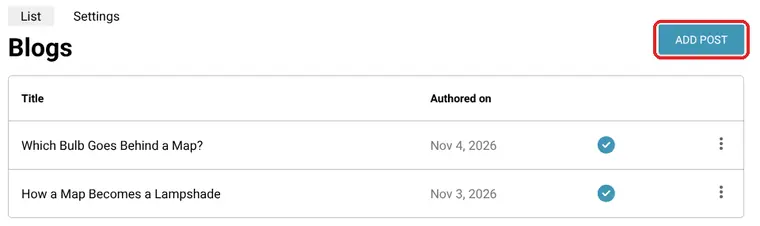
The Post date is the date shown on the post. Under Publishing, pick one:
- Publish now: the post goes live when you save.
- Publish on the post date: set a future Post date and time, and the post stays hidden until then, when it publishes itself. Good for writing a holiday post in October.
- Save as draft: keep working on it. Nobody sees a draft but you.
The teaser: how the post looks on your blog page
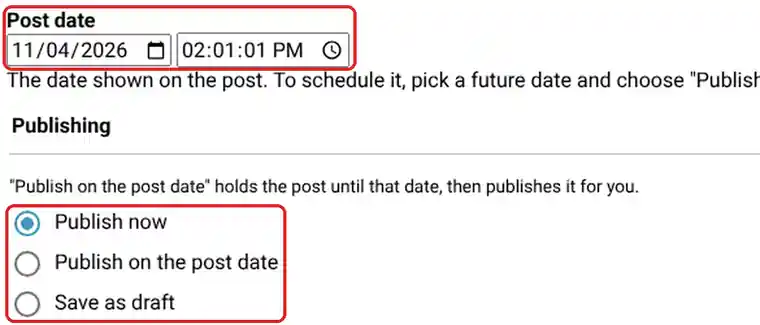
Below the pictures, Teaser on the blog page shows the post the way your blog page will show it, in your blog's layout. Click Edit on it to change two things right there:
- Subtitle: one line under the title, on the blog page and on the post itself.
- Preview text: the few words the blog page shows instead of the start of your post. Leave it blank and the blog page uses the start of the post.
Click Done when you are finished. The two buttons underneath, Cover on the post itself and Cover on the teaser, turn the cover picture on or off in each place. Turn off the one on the post if your first photo is already inside the text.
Search engines and menu links
Search engine optimization (SEO) is filled in for you from the title and the post. Leave it alone unless you want to word it yourself; see SEO on IndieMade.
To put one post in your menu, tick Provide a menu link, type the Menu link title and choose where it goes under Parent link. Most posts do not need this; your Blog link already leads to all of them.
Editing, hiding and deleting posts
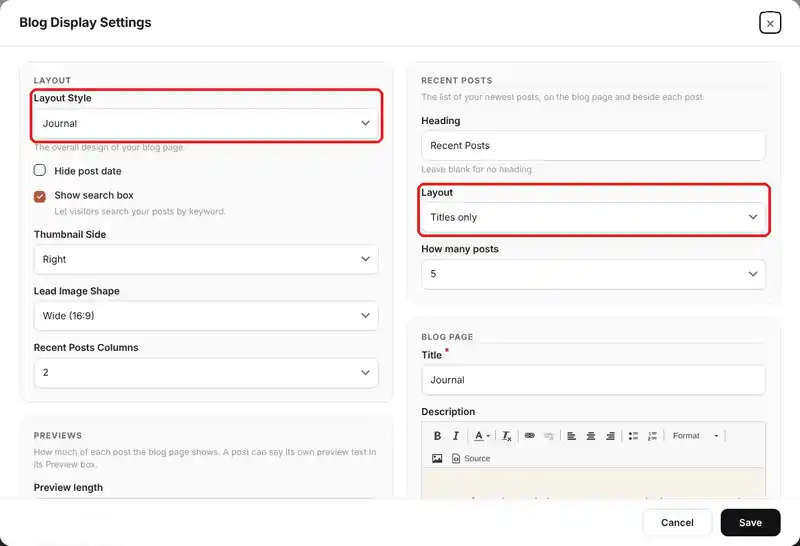
On Dashboard → Blog Posts, click the check mark on a row to hide a published post or publish a hidden one. The three dots at the end of the row have Edit and Delete. Deleting cannot be undone, so hide a post instead if you might want it back.
Choosing how your blog page looks
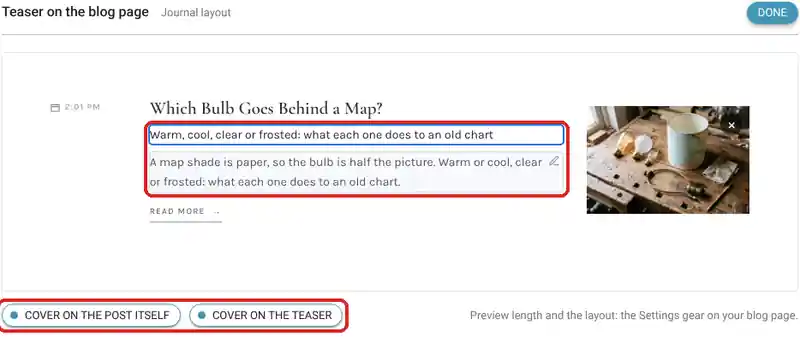
Open your blog page while you are signed in and click the Settings gear in the bottom toolbar. Blog Display Settings opens. The same settings are also on the Settings tab of Dashboard → Blog Posts.
- Layout Style: the design of your blog page. Choose Default, Full Page Grid, Gazette or Journal. Gazette and Journal have extra choices that appear when you pick them; Journal, for example, lets you set the Thumbnail Side, the Lead Image Shape and the Recent Posts Columns.
- Hide post date: leave dates off, handy if you post rarely.
- Show search box: lets visitors search your posts by keyword.
- Previews: Preview length sets how much of each post the blog page shows, from First paragraph to The whole post, and "Read more" words is the link text. A post with its own preview text uses that instead.
- Recent Posts: the list of your newest posts on the blog page and beside each post. Set the Heading (blank for none), the Layout (Titles only, Date and title, Small picture and title or Cards) and How many posts.
- Blog page: the Title of your blog page, such as Journal or News, and a Description shown above the posts.
Click Save and the page reloads with your changes.
Showing or hiding the Blog link
Your Blog link sits in your main menu. To move it to the footer, rename it or hide it, go to Dashboard → Menus; see How to Manage Your Main and Footer Menus.
Tips
- Write about the making. Shoppers love seeing how a piece comes together, and it is writing nobody else can copy.
- Link to the products you mention. A post about a new glaze should link straight to the mugs.
- Write a few posts at once and schedule them a few weeks apart with Publish on the post date. Your blog stays fresh while you are in the studio.
- Use a wide, bright cover picture. It is what people see when the post is shared.
Questions? Email support@indiemade.com.