Adding Sections to Any Page on IndieMade

At IndieMade we try and keep things as simple as possible when you build a website. However, we do understand that it is important to have the ability to add sections to a page on your website. At IndieMade we believe simplicity is key. If you strive for complexity, customization, options, whistles, and the bells; try some of the larger website-building tools.

Simple e-commerce or information websites do not need sections. Keep it simple.
If you are building an e-commerce site you need to add your products and/or product categories add some pages and you are done. If you just want an information site and do not sell products online, all you need to do is add pages and maybe a photo gallery or two.

You always have the option of adding additional sections to any page at any time.

The IndieMade help section you see here is built with the same tools available to you. It consists of many pages, we edit the pages inline and occasionally use the Edit Page button to edit other properties of the page or tweak the HTML with the source editor. We only have one text section with multiple items in columns to build our index on the homepage.

What are Sections on IndieMade?

Sections, simply put, is custom website content you would like to add to a page for any reason. It is often used to display a hero image at the top of a page, especially a homepage. You can see examples on our IndieMade Theme Demos. Below you will see an example of a section that describes a hero image. It is a text section with a grey background and I am currently working in the 'main content' of this page. I will continue to create the rest of this page by adding additional content/text sections without a background color.


A hero image on a website is a large, visually striking image that appears at the top of a webpage. It is usually the first thing that visitors see when they arrive at a website and it is designed to grab their attention and make a strong first impression.

Hero images are typically used to showcase a website's main message or theme, and they often feature high-quality photography, graphic design, or illustrations. They can be static or dynamic (such as a video or animation) and may also contain text or call-to-action buttons to encourage visitors to explore the website further.

The hero image is an important component of website design, as it sets the tone and creates a memorable visual experience for visitors. When done well, it can help to establish the brand identity of a website and make a lasting impression on visitors.

(The section you see here is an IndieMade text only section with a background color applied)


How to add a Section on IndieMade

At the bottom of the screen in the Dashboard Toolbar Click the pencil icon to enable edit mode. The pencil icon will brighten to let you know it is enabled and dimmed  when not in "Edit Mode." In the screenshot below the pencil icon is active letting me know edit mode is enabled. Note that the Edit Page button is to edit the main content and properties of the page. In edit mode, you can edit any text on the page inline. (I am editing this page inline with edit mode enabled)

Adding a Section

Now that you are in edit mode the add new sections buttons will appear above and below your main content. Main content is the primary content on the page whether it be a page, store, category page, gallery or blog. Remember, you can add sections to any page.

Section Template Designs

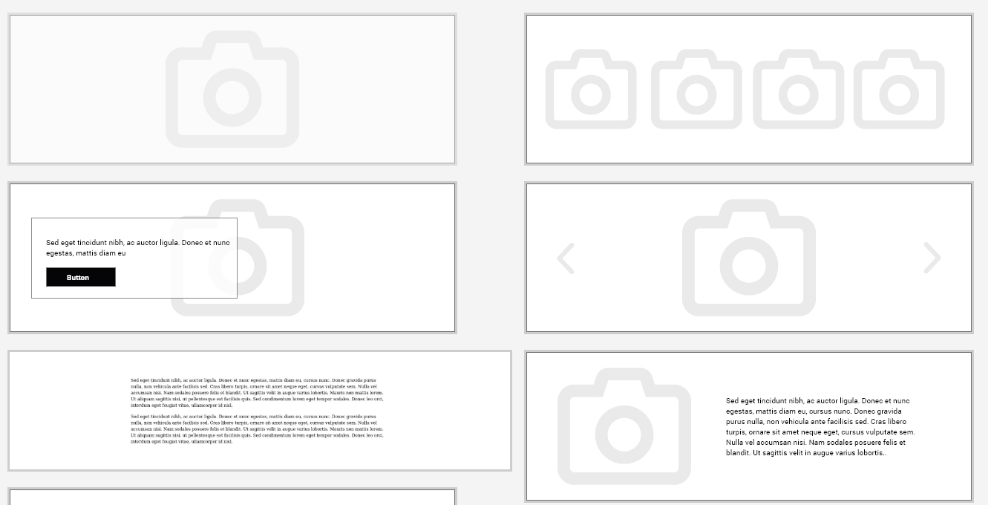
Clicking on the add new section button will display a listing of our section templates with small previews. Once you add a section template you will see placeholder images that are intended for you to replace with your own photos and content. We have intentionally kept these templates simple but will continue to add more.

Adding Items to an IndieMade Section

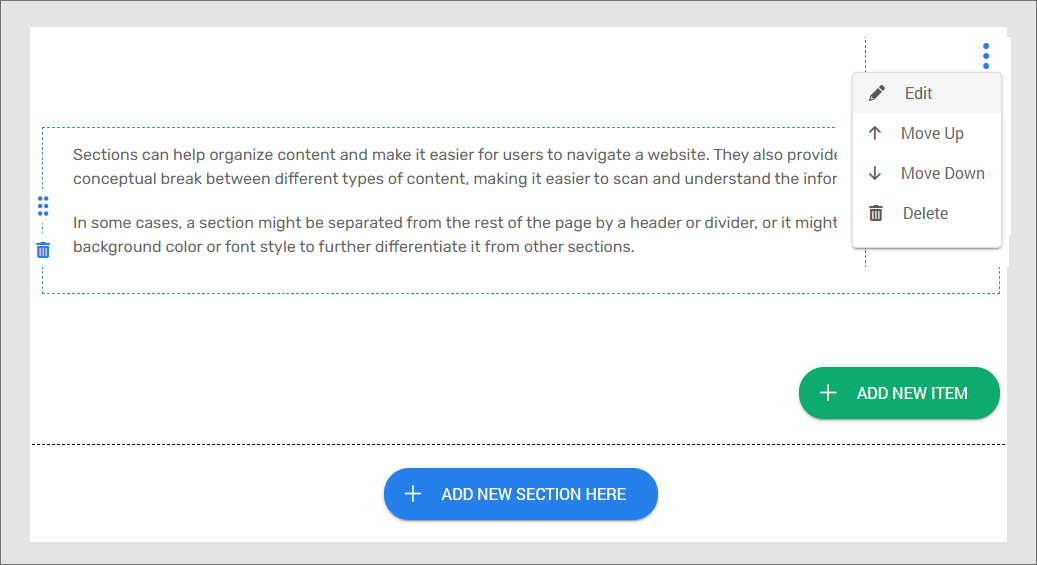
When you add a section you will also notice a "Add New Item" button to the right of the section you added. The "Add New Item" button will allow you to add the same type of content within that section. Especially when the section template design contains multiple items in columns. Below is an example of the "Add New Item" button. Once added you drag to re-order each item within a section or delete the section. A section item is basically a mini section within  a section or a child of the main section.

How to Edit Sections on an IndieMade Website

Once you add the section to your page and depending on the section type and the designer's template design there will be placeholder images and placeholder text that you can edit directly on the page.

How to Edit Section Text Inline and Styling using the Text Editor

Click in the section and edit the text, an editor window on the section where you can change the weight, font-style, add links, text alignment, and even upload your own image. The upload image on the editor is for adding simple images inline with your text. Several of the example screenshots on this page are added this way. But for complex layouts and full screen images use a dedicated section that has an image built in. The editor as shown below was added to this page with the upload image in the editor. It is not meant for complex layouts and design so like the rest of your site keep this simple!

Editing / Uploading Images.

As described above you can add images with the image upload button in the editor but for more complex layouts use the pre-defined templates that include images as part of the design. When adding a section template that contains pre-defined images you will see a camera icon that allows you to remove and replace the image by uploading an image on your computer. 

Here is a small snippet from our large image template showing a portion of the placeholder lighthouse photo. When you hover over the placeholder image in the section you will notice a small camera icon and clicking on that icon will allow you to upload and replace this placeholder image.

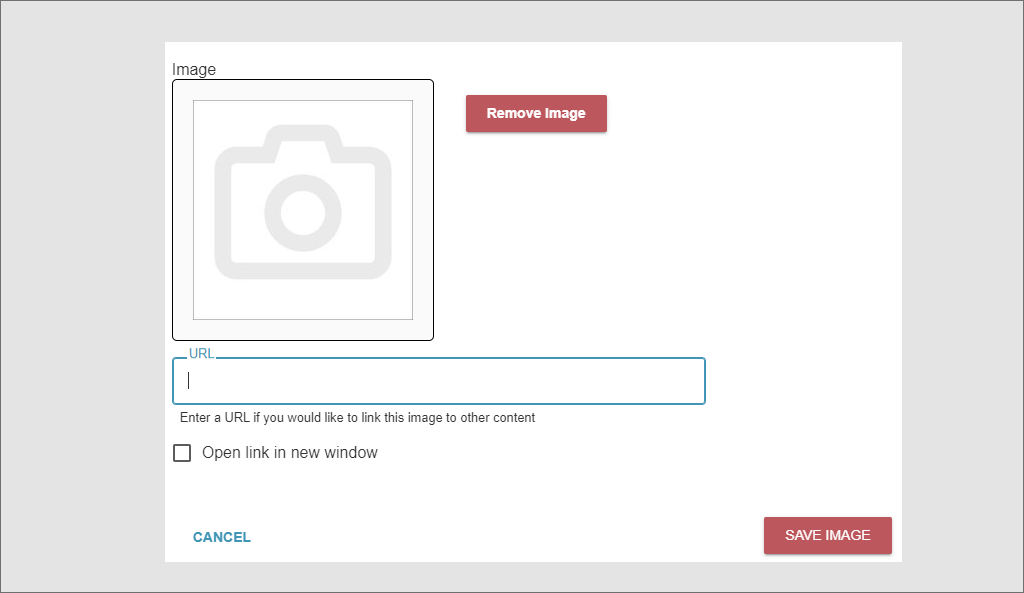
Below is an example of the edit image screen. Remove and upload a replacement photo and you can also optionally enter a URL and whether or not the link will open in a new window. Note that choosing to select "Open link in new window" will open a new browser tab.

Editing Settings and Properties on an IndieMade Section

To view and edit the section settings and advanced properties click on the 3 vertical dots located in the top right of each section. In the screenshot below you can see the edit section properties icon. Here you can edit the properties, move the entire section up or down on the page or delete the entire section. You will also notice to the left a drag handle to sort or delete individual items that you have added within a section. Choose Edit to open the Section settings and properties.

The Section Edit Screen

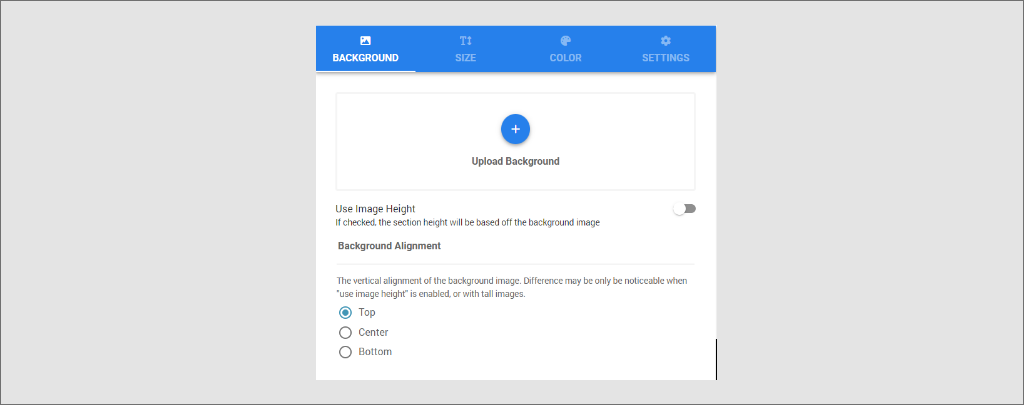
The section edit screen consists of 3 tabs Background, Size, Color and Settings. Let's talk more about each one of these tabs.

The Section Background Tab

A background image will appear behind the entire section it will not repeat so be sure to upload dimensions that will fit even the largest of displays. We recommend around 2000 pixels wide.

Use Image Height: If this is checked we will use the height of the uploaded image to determine the initial height of the section. Of course, if you add more content the section will grow.

Vertical alignment: We will do our best to position the uploaded image based on the top, center or bottom of the image.

The Size Tab

Columns: Set the number of columns for each section item. This does not apply to all section designs but this setting will show for all.

Match Content Width: The page you are viewing right now is an IndieMade page and the content width is standard width so that content and paragraphs are easy to read and scan. It is centered on the page on larger displays and full screen on mobile devices. If you enable "Match Content Width" your section be the same as the standard content width.

The Color Tab

Here you can set the color for the entire section or for each individual item (if applicable) within a section. You can select from the color picker or type or paste in any Hex color code. Leave the text box empty if no color is needed. 

Section Settings

Add Section Title: This will expose a section title field on this section if you want a title, description or intro for the entire section.
Show on Pages: This allows you to add this section to other pages!


I think that about wraps up sections. If you feel I missed something or have some ideas or questions feel free to send us an email to support@indiemade.com!